
#파일 저장하고 가져오기
import pandas as pd

pew=pd.read_csv("pew.csv")
pew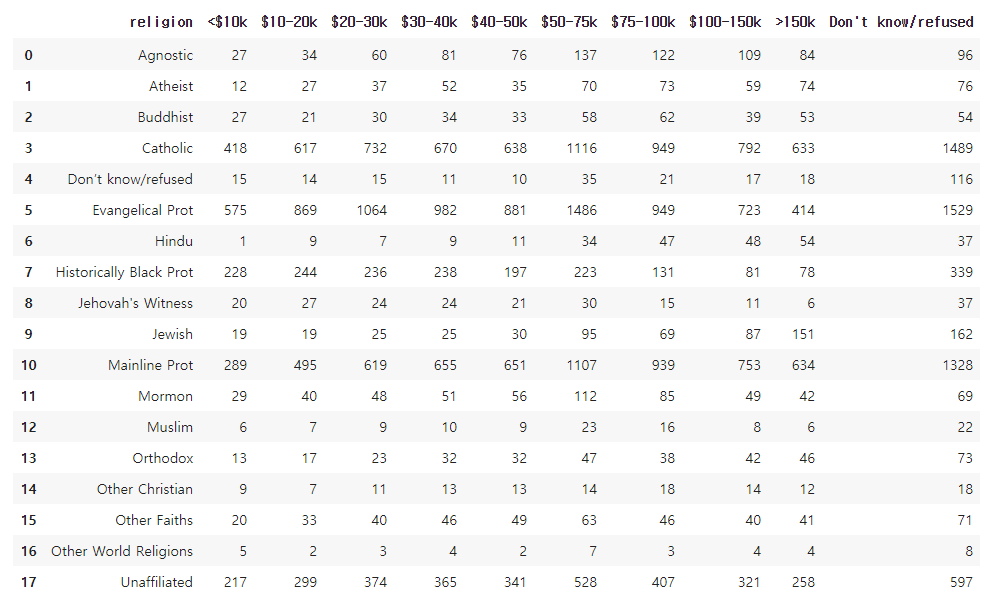
##pew 데이터는 종교에 따른 소득 데이터
##위 표는 비효율적이다. 성격이 비슷한 돈에 관한 열이 금액 별로 있어 불필요하게 많다.
돈에 관한 열을 하나로 만든다면 보기에도 좋고 머신러닝 관점에서 봤을 때 데이터가 더 늘어나기 때문에 좋다.(학습시키기에 좋다.)
##같은 성격을 가지고 있는 열들을 하나의 열로 만드는 게 필요하다.
#melt 함수를 이용하여 열을 행으로 내리기
pew2=pd.melt(pew,id_vars='religion',var_name='income',value_name='count')
pew2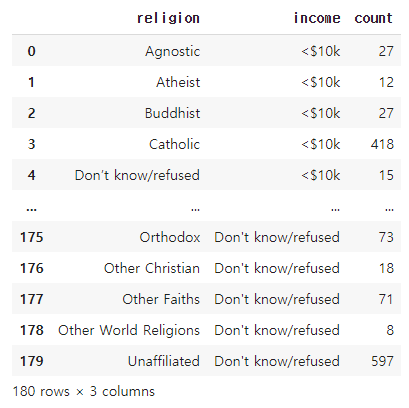
##melt 함수 : 열을 행으로 내려주는 함수
| id_vars | 고정할 열 이름 |
| value_vars | 행으로 내릴 열 이름 |
| var_name | 행으로 내려온 열의 새로운 열 이름 |
| value_name | 행으로 내려온 열의 데이터가 저장된 열 이름 |
##위의 데이터에서 value_vars를 따로 지정하지 않은 것은 고정할 열 외의 모든 열을 행으로 내리고자 하기 때문이다.
##religion 열 외에는 다 행으로 내려옴.
#열을 행으로 내리기(2)
##파일 저장하고 가져오기
billboard=pd.read_csv("billboard.csv")
billboard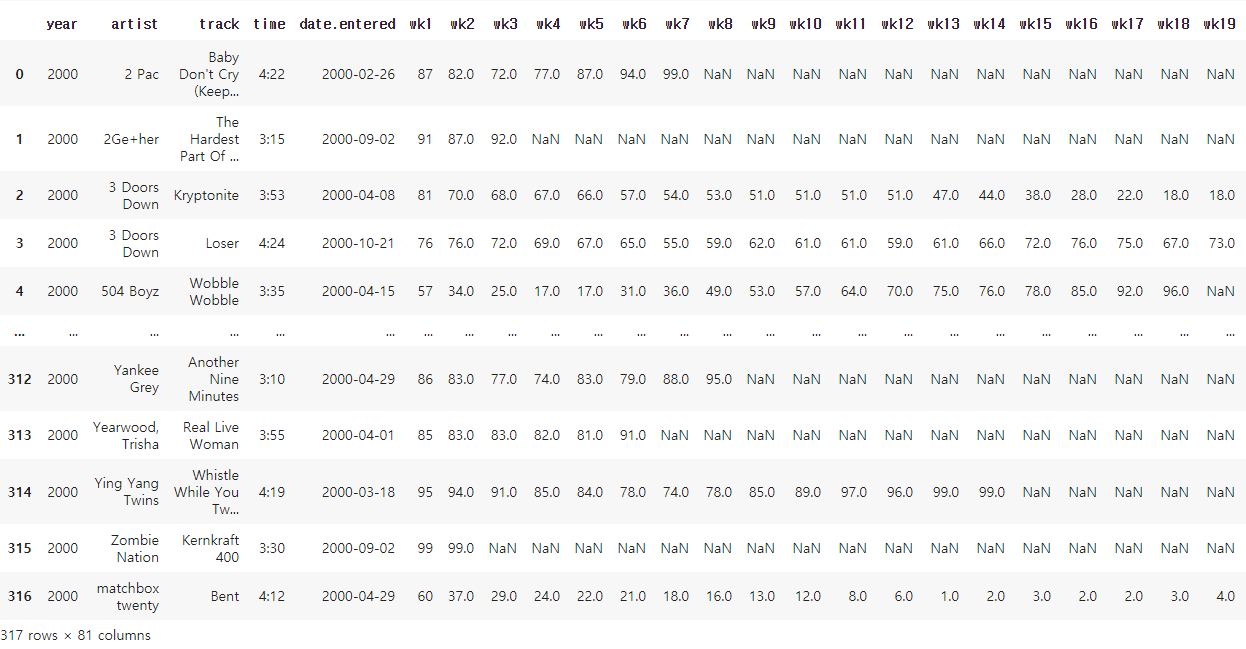
##week와 관련된 열이 너무 많아 하나의 열로 만들기
##새로운 변수에 열을 행으로 내린 데이터 저장하기
billboard2=pd.melt(billboard,id_vars=['artist','track','year','time','date.entered'],var_name='week',value_name='rating')
billboard2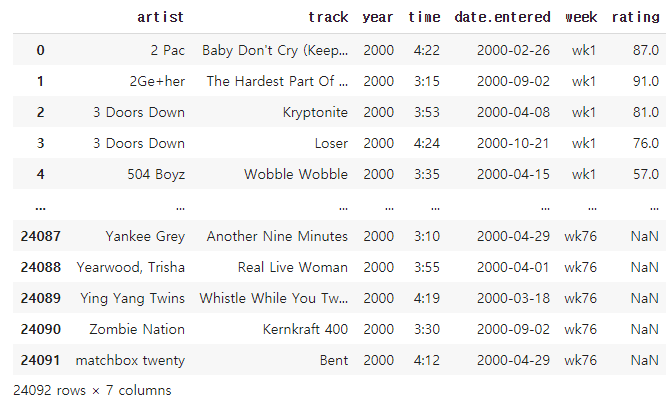
##'artist' , 'track' , 'year' , 'time', 'date.entered'열은 고정한다.
##그 외의 week와 관련된 열은 모두 행으로 내리며 새로운 열의 이름은 'week'로 지정한다.
##새로운 열의 데이터들의 열 이름은 'rating'으로 지정한다.
#열을 행으로 내리기(3)
##파일 저장하고 가져오기
ebola=pd.read_csv("country_timeseries.csv")
ebola

ebola2=pd.melt(ebola,id_vars=['Date','Day'])
ebola2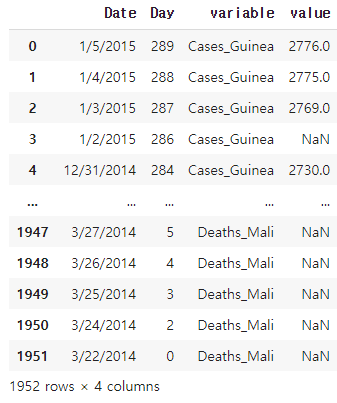
##'Date','Day'열을 고정하고 나머지 열을 모두 행으로 내린다.
##이때 새로운 열의 이름과 이 데이터들의 열 이름을 지정해 주지 않으면 기본 값으로 'variable', 'value'가 지정된다.
##문자열 데이터 나누기
>ebola_split=ebola2['variable'].str.split('_')
>ebola_split


0       [Cases, Guinea]
1       [Cases, Guinea]
2       [Cases, Guinea]
3       [Cases, Guinea]
4       [Cases, Guinea]
             ...
1947     [Deaths, Mali]
1948     [Deaths, Mali]
1949     [Deaths, Mali]
1950     [Deaths, Mali]
1951     [Deaths, Mali]
Name: variable, Length: 1952, dtype: object
##variable의 데이터를 '_' 기준으로 나눈다.
##나눈 데이터 변수에 저장하기
>status=ebola_split.str.get(0)
>country=ebola_split.str.get(1)
>status


0        Cases
1        Cases
2        Cases
3        Cases
4        Cases
         ...
1947    Deaths
1948    Deaths
1949    Deaths
1950    Deaths
1951    Deaths
Name: variable, Length: 1952, dtype: object
##새로운 열 생성하고 데이터 저장하기
ebola2['Status']=status
ebola2['Country']=country
del ebola2['variable']
ebola2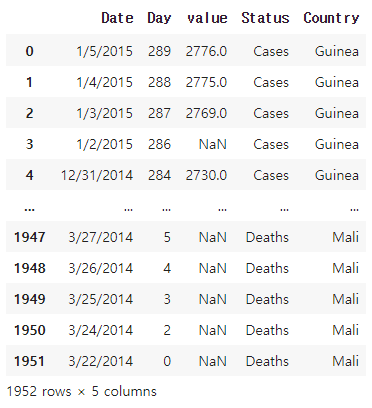
#열을 행으로 내리기(4)
##파일 저장하고 가져오기
weather=pd.read_csv("weather.csv")
weather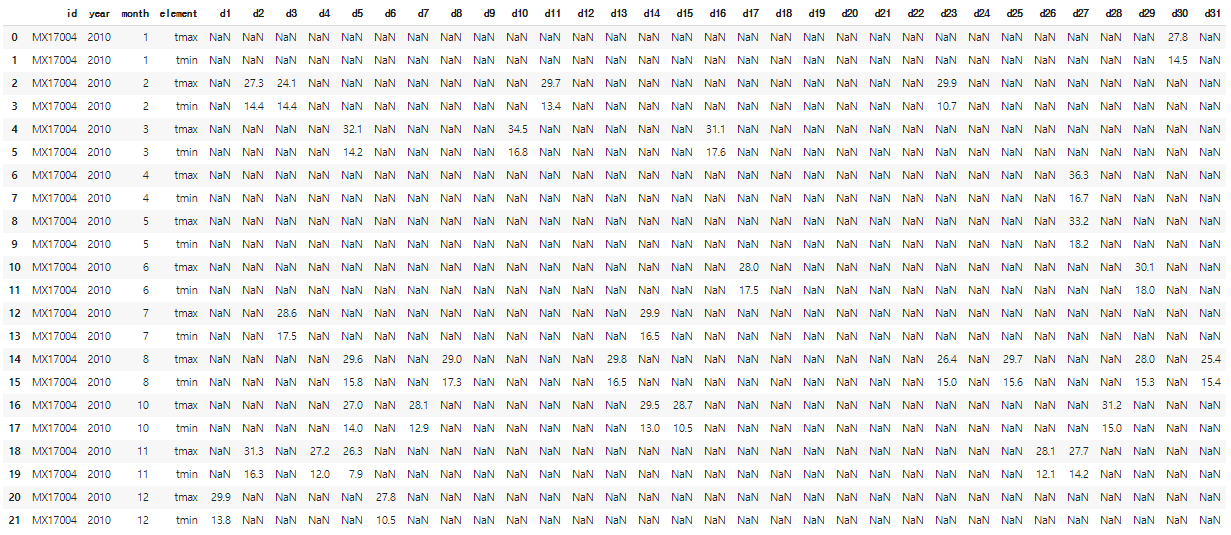
weather2=pd.melt(weather,id_vars=['id','year','month','element'],var_name='day',value_name='temp')
weather2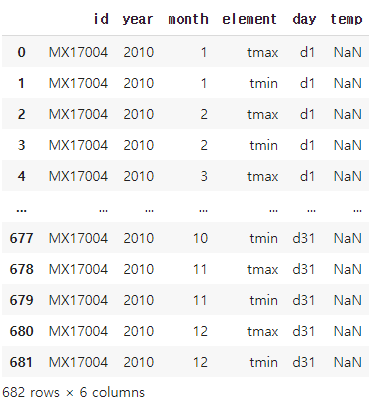
##'id' ,'year' , 'month' , ' element' 열은 고정하고 나머지 day에 관련된 열은 모두 형으로 내린다.
##day와 관련된 열의 새로운 열 이름은 'day'로 지정한다.
##새로운 열의 데이터들의 열 이름은 'temp'로 지정한다.
#pivot_table함수를 이용하여 표 정렬하기
##pivot_table함수 : 행을 열로 올려주는 함수
weather3=weather2.pivot_table(index=['id','year','month','day'],
                              columns='element',
                              values='temp',
                              dropna=False)
weather3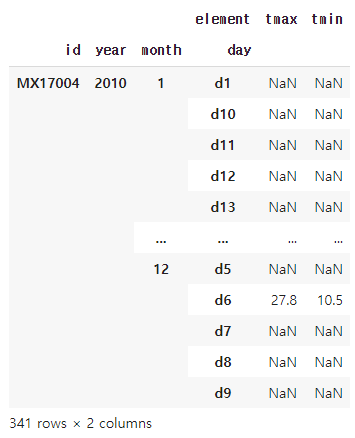
##index에 입력된 열들은 고정시키고 중복된 값들은 하나로 묶는다.
##column 에는 행을 열로 올려줄 열을 지정한다.
##value는 column에서 지정된 열의 데이터 값들이다.
##dropna는 True 이면 Nan 값을 모두 제거하고, False이면 Nan값을 그대로 둔다.
#인덱스 새로 설정하기
weather3.reset_index()
#정규 표현식: 원하는 패턴의 문자열을 효율적으로 찾아주고 치환, 제거할 수 있는 방법
| \d | 숫자 |
| \s | 공백 |
| ? | 있을 수도 있고 없을 수 도 있다. |
| () | chapter, 내가 원하는 부분만을 지정한다. 의미있는 소괄호 >>그냥 소괄호를 표현하고 싶을 때는 \( ,\) 이런식으로 소괄호 앞에 역슬래쉬 넣기 |
| \+ | + |
이 외에도 정규식 표현은 많다...
##re라이브러리를 이용하여 정규식 검사하기
>import re
>tel='1234567890'
>re.match(pattern='\d\d\d\d\d\d\d\d\d\d',string=tel)


<re.Match object; span=(0, 10), match='1234567890'>
##연속된 숫자를 검사, 이때 숫자는 \d로 나타낸다.
>tel='123 456 7890'
>re.match(pattern='\d\d\d \d\d\d \d\d\d\d',string=tel)


<re.Match object; span=(0, 12), match='123 456 7890'>
##공백은 ' '스페이스로 나타낼 수 있고 \s 로도 나타낼 수 있다.
tel='123 456 7890'
re.match(pattern='\d\d\d\s\d\d\d\s\d\d\d\d',string=tel)


<re.Match object; span=(0, 12), match='123 456 7890'>
##번호 입력의 2가지 형태의입력을 받았다고 할 때 두 가지 모두 잡기(01012341234/010 1234 1234)
tel='123 456 7890'

re.match(pattern='\d{3}\s?\d{3}\s?\d{4}',string=tel)
<re.Match object; span=(0, 12), match='123 456 7890'>


tel='1234567890'

re.match(pattern='\d{3}\s?\d{3}\s?\d{4}',string=tel)
<re.Match object; span=(0, 10), match='1234567890'>
##연속되는 숫자를 나타내는 또 다른 방법 이용하기
tel='(123) 456 7890'
re.match(pattern='\(\d{3}\)\s?\d{3}\s?\d{4}',string=tel)

<re.Match object; span=(0, 14), match='(123) 456 7890'>
##\d{n} 에서 n은 연속되는 숫자의 개수를 의미한다.
##국제번호 정규식 검사해보기
>tel='+1 (123) 456 7890'
>re.match(pattern='\+\d\s\(\d{3}\)\s?\d{3}\s?\d{4}',string=tel)


<re.Match object; span=(0, 17), match='+1 (123) 456 7890'>
## + 는 \+ 로 나타낸다.
#정규화 연습 사이트
RegexOne - Learn Regular Expressions - Lesson 1: An Introduction, and the ABCs
RegexOne - Learn Regular Expressions - Lesson 1: An Introduction, and the ABCs
Regular expressions are extremely useful in extracting information from text such as code, log files, spreadsheets, or even documents. And while there is a lot of theory behind formal languages, the following lessons and examples will explore the more prac
regexone.com
##텍스트 마이닝 : 비정형 데이터에 대한 마이닝 과정인데 마이닝이란 데이터로부터 통계적인 의미가 있는 개념이나 특성을 추출하고 이것들 간의 패턴이나 추세 등의 정보를 끌어내는 과정.
여기서 비정형 데이터란 대표적으로 인터넷에 있는 다양한 게시물이나 비정형 문서, 카카오톡 메시지 및 유튜브 동영상 등이 있다.
##워드 클라우드 : 텍스트 마이닝 방법 중 하나로 , 문서의 키워드, 개념 등을 직관적으로 파악할 수 있도록 핵심 단어를 시각적으로 돋보이게 하는 기법.
#워드 클라우드 만들기
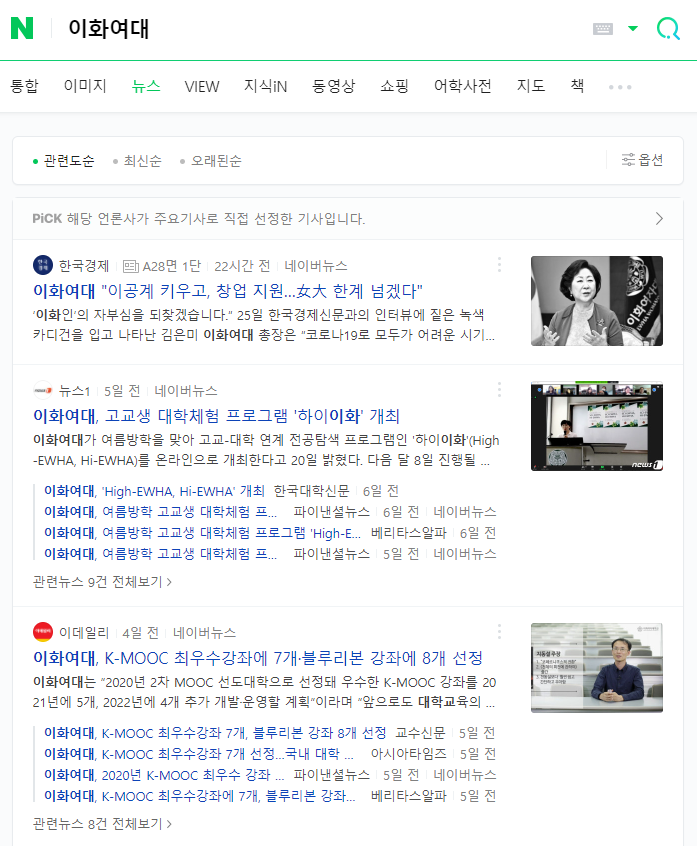
#'이화여대' 검색하고 뉴스들의 제목과 내용으로 워드 클라우드 만들기
##메인 검색창에 '이화여대' 검색하고 뉴스 메뉴 들어가기
##검색한 페이지 url 가져오기(크롤링)
import requests
from bs4 import BeautifulSoup
url=requests.get("https://search.naver.com/search.naver?where=news&sm=tab_pge&query=%EC%9D%B4%ED%99%94%EC%97%AC%EB%8C%80&sort=0&photo=0&field=0&pd=0&ds=&de=&cluster_rank=102&mynews=0&office_type=0&office_section_code=0&news_office_checked=&nso=so:r,p:all,a:all&start=1")
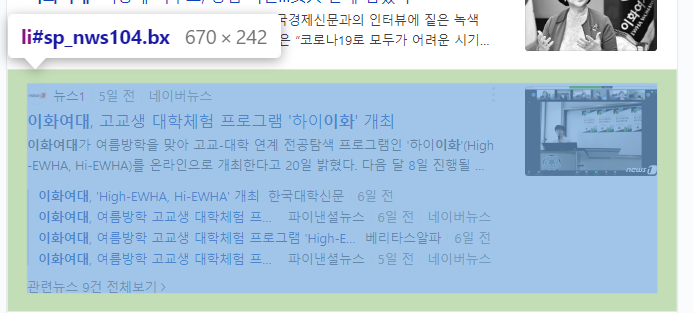
html=BeautifulSoup(url.text)##ul의 클래스가 list_news

import requests
from bs4 import BeautifulSoup

url=requests.get("https://search.naver.com/search.naver?where=news&sm=tab_pge&query=%EC%9D%B4%ED%99%94%EC%97%AC%EB%8C%80&sort=0&photo=0&field=0&pd=0&ds=&de=&cluster_rank=102&mynews=0&office_type=0&office_section_code=0&news_office_checked=&nso=so:r,p:all,a:all&start=1")
html=BeautifulSoup(url.text)

for i in html.select('ul.list_news')[0].select('li.bx'):
  print(i)
#제목 데이터 가져오기

import requests
from bs4 import BeautifulSoup

url=requests.get("https://search.naver.com/search.naver?where=news&sm=tab_pge&query=%EC%9D%B4%ED%99%94%EC%97%AC%EB%8C%80&sort=0&photo=0&field=0&pd=0&ds=&de=&cluster_rank=102&mynews=0&office_type=0&office_section_code=0&news_office_checked=&nso=so:r,p:all,a:all&start=1")
html=BeautifulSoup(url.text)

for i in html.select('ul.list_news')[0].select('li.bx'):
  print(i.select('a.news_tit')[0].text)
##내용 가져오기

import requests
from bs4 import BeautifulSoup

url=requests.get("https://search.naver.com/search.naver?where=news&sm=tab_pge&query=%EC%9D%B4%ED%99%94%EC%97%AC%EB%8C%80&sort=0&photo=0&field=0&pd=0&ds=&de=&cluster_rank=102&mynews=0&office_type=0&office_section_code=0&news_office_checked=&nso=so:r,p:all,a:all&start=1")
html=BeautifulSoup(url.text)


for i in html.select('ul.list_news')[0].select('li.bx'):
  title=i.select('a.news_tit')[0].text           #제목은 title변수에, 내용은 content 변수에 저장
  content=i.select('div.news_dsc')[0].text
  print(content)
##제목과 내용을 하나의 변수에 저장하기
import requests
from bs4 import BeautifulSoup

url=requests.get("https://search.naver.com/search.naver?where=news&sm=tab_pge&query=%EC%9D%B4%ED%99%94%EC%97%AC%EB%8C%80&sort=0&photo=0&field=0&pd=0&ds=&de=&cluster_rank=102&mynews=0&office_type=0&office_section_code=0&news_office_checked=&nso=so:r,p:all,a:all&start=1")
html=BeautifulSoup(url.text)

total_text=''


for i in html.select('ul.list_news')[0].select('li.bx'):
  title=i.select('a.news_tit')[0].text
  content=i.select('div.news_dsc')[0].text
  total_text+=(title + ' '+ content)

total_text
##페이지 별로 url 비교해보기
1페이지 url: https://search.naver.com/search.naverwhere=news&sm=tab_pge&query=%EC%9D%B4%ED%99%94%EC%97%AC%EB%8C%80&sort=0&photo=0&field=0&pd=0&ds=&de=&cluster_rank=102&mynews=0&office_type=0&office_section_code=0&news_office_checked=&nso=so:r,p:all,a:all&start=1
2페이지 url:
https://search.naver.com/search.naverwhere=news&sm=tab_pge&query=%EC%9D%B4%ED%99%94%EC%97%AC%EB%8C%80&sort=0&photo=0&field=0&pd=0&ds=&de=&cluster_rank=128&mynews=0&office_type=0&office_section_code=0&news_office_checked=&nso=so:r,p:all,a:all&start=11
3페이지 url:
https://search.naver.com/search.naverwhere=news&sm=tab_pge&query=%EC%9D%B4%ED%99%94%EC%97%AC%EB%8C%80&sort=0&photo=0&field=0&pd=0&ds=&de=&cluster_rank=148&mynews=0&office_type=0&office_section_code=0&news_office_checked=&nso=so:r,p:all,a:all&start=21
>>>페이지 넘어가면서 start 값이 10씩 늘어나는 것을 알 수 있다.
##모든 페이지의 제목과 내용 저장하기
import requests
from bs4 import BeautifulSoup
import re
from tqdm import tqdm

total_text=''

for n in tqdm(range(1,3992,10)):    #page는 400page까지 밖에 없다.
  url=requests.get(f"https://search.naver.com/search.naver?where=news&sm=tab_pge&query=%EC%9D%B4%ED%99%94%EC%97%AC%EB%8C%80&sort=0&photo=0&field=0&pd=0&ds=&de=&cluster_rank=102&mynews=0&office_type=0&office_section_code=0&news_office_checked=&nso=so:r,p:all,a:all&start={n}")
  html=BeautifulSoup(url.text)


  for i in html.select('ul.list_news')[0].select('li.bx'):
    title=i.select('a.news_tit')[0].text
    content=i.select('div.news_dsc')[0].text
    total_text+=(title+''+content)
##전체 데이터 길이 확인해보기
>len(total_text)

618442
##모든 단어 빈도수 저장하기
from wordcloud import WordCloud
import matplotlib.pyplot as plt

dic={}


for i in re.findall('[가-힣]+', total_text):
  if len(i)>2:
    if i not in dic:
      dic[i]=1
    else:
      dic[i]+=1

dic
##조사는 무시 :KoNLPy(한글 형태소 분석기) 구글 코랩에서 안 깔려있음.
{'이화여대': 4933,
 '이공계': 23,
 '키우고': 2,
 '넘겠다': 2,
 '이화인': 38,
 '자부심을': 2,
 '되찾겠습니다': 1,
 '한국경제신문과의': 1,
 '인터뷰에': 1,
 '카디건을': 1,
 '나타난': 2,
 '김은미': 310,
.......생략.......
 '생명과학과': 27,
 '김완규': 9,
 '설립한': 19,
 '카이팜이': 4,
 '중소벤처기업부': 4,
 '대강당': 5,
 '모의논술고사를': 14,
 '실시한다': 14,
 '기간은': 10,
 '시부터': 30,
 '시까지로': 4,
 '인터넷을': 5,
 '전자상거래법': 10,
 '개정안': 7,
 '플랫폼': 148,
 '규모에': 6,
 '적용해야': 3,
 ...}
##워드 클라우드 그리기
wc=WordCloud(font_path='BMDOHYEON_ttf.ttf',               #폰트설정,배경 설정, 크기설정
             background_color='white',
             width=800,
             height=800).generate_from_frequencies(dic)  #빈도순으로 워드클라우드를 그린다.

plt.figure(figsize=(10,10))  #도화지 크기는 10,10 정사각형으로 그리기
plt.imshow(wc)               #wordcloud로 그려내기
plt.tight_layout()           #레이아웃에 딱 맞기 그리기
plt.axis('off')              #x,y축 없애기
plt.show()
'Python > 파이썬으로 배우는 머신러닝 기초 교육' 카테고리의 다른 글
| 5일차(K-최근접 이웃 분류 모델) (0) | 2021.08.05 |
|---|---|
| 4일차(머신러닝 기초) (0) | 2021.07.28 |
| 3일차(데이터 분석 및 시각화) (0) | 2021.07.25 |
| 3일차(데이터 가공) (0) | 2021.07.23 |
| 2일차(데이터 크롤링3) (0) | 2021.07.20 |